
Carefully cut or remove the tape on the top of the MakerBot Sketch box and open the top flaps. If cutting, make sure not to cut too deep as to not damage the accessory on the top of the packaging.
Step 2 - Removing the top packaging
The protective packaging on the top of your MakerBot Sketch contains many of the accessories that will be used with your printer.
Carefully lift off this packaging and set it aside.

This packaging should contain the following items:
- One Spool PLA Material
- One Extra Build Plate
- Tool Kit
- One Packet of Grease
- One 2.5mm Hex Key
- One Plunging Tool
- One Phillips Screw Driver
- Accessory Kit
- One Pair Snips
- One Spatula
- One North America Power Cable
- One EU Power Cable
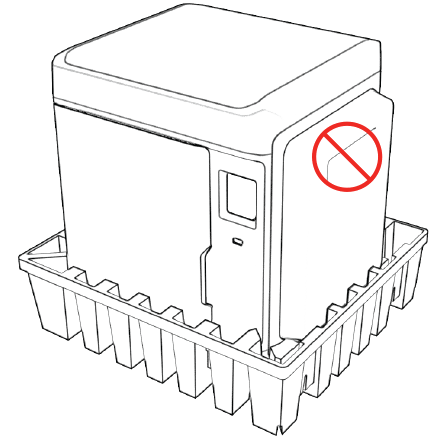
Step 3 - Lifting the printer out of the packaging
Maker sure you have a flat stable area available to place your printer.
Making sure not to lift by the spool enclosure on the side, lift your printer from the bottom and place it onto the flat stable surface.
Step 4 - Removing the protective wrapping
There is bubble wrap and protective film around the MakerBot Sketch to protect it during shipment. Before continuing with the setup process, this will need to be removed.
First remove the bubble wrap from around the printer. Next remove the protective film from the clear surfaces.
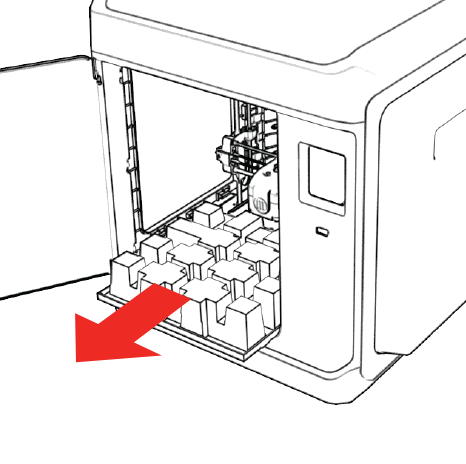
Step 5 - Remove the internal packaging material
Open the front door of the MakerBot Sketch. Pull forward the Z-stage packing material to remove it.
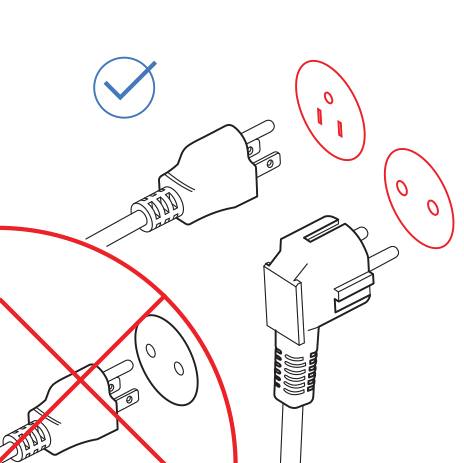
Step 5 - Plugging in the MakerBot Sketch
Your MakerBot Sketch comes with two power cords, one for North American style outlets (3 prong) and one for EU style outlets (2 prong).
Select the appropriate power cord for your outlets from the starter kit.
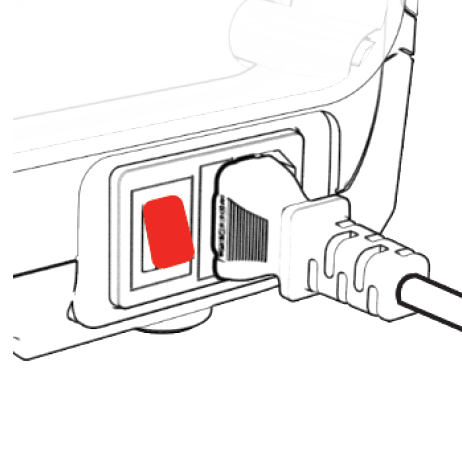
Connect the appropriate power cord to the power input on your MakerBot Sketch. The power input is located in the bottom right side of the Material Holder side of the unit (right side when looking at the front).
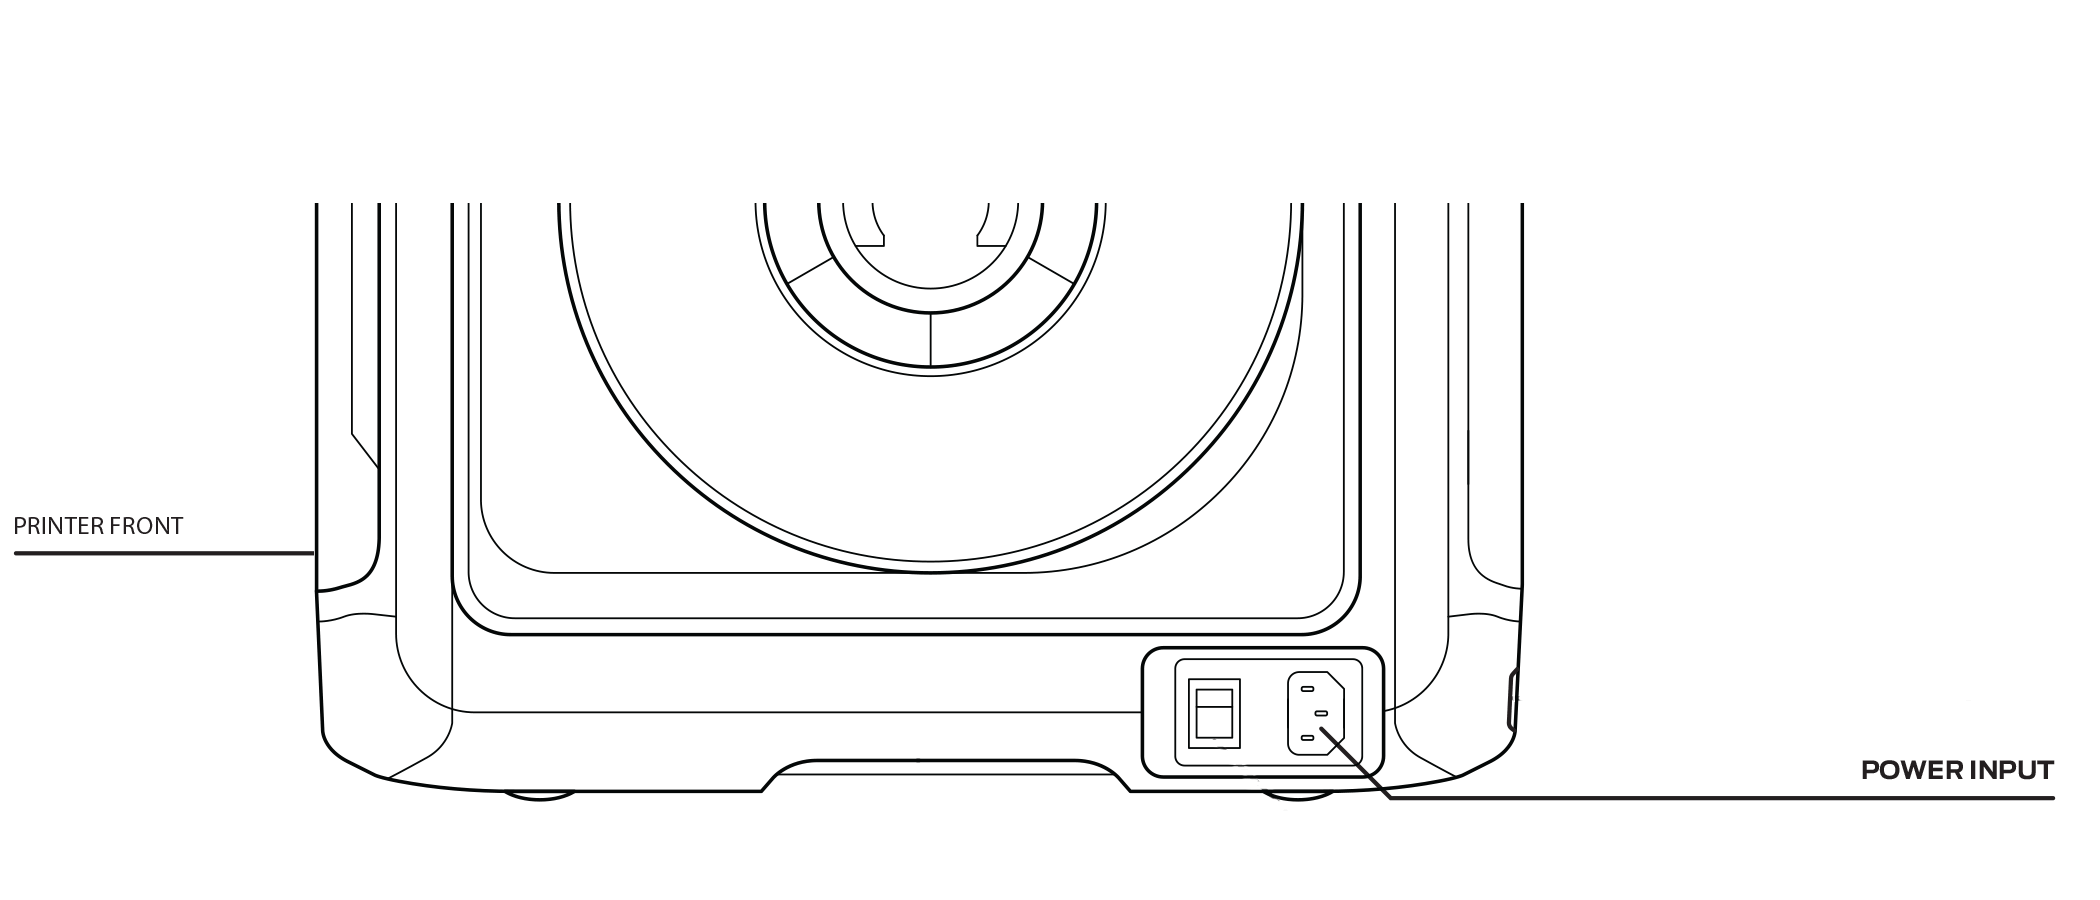
Step 6 - Turning on the MakerBot Sketch
Once it has been plugged in, you can turn on by flipping the switch next to the power input.
Step 7 - Starting the first run experience
Once your MakerBot Sketch has been powered on, you can follow the instructions on the touch screen to complete the first run experience.
