
Check out the video guide below which will walk you through the Assisted Leveling Process on your METHOD Series Printer
The leveling script can be accessed as part of the first run experience or by entering the "Advanced" menu on the MakerBot Method and selecting "Assisted Leveling".
If the "Assisted Leveling" option is grayed out, the unit is engaged in another activity. Most likely a print has completed, but has not been registered as done. On the main interface screen select "Print" and then "Done" on the next screen.
Running the Leveling Script
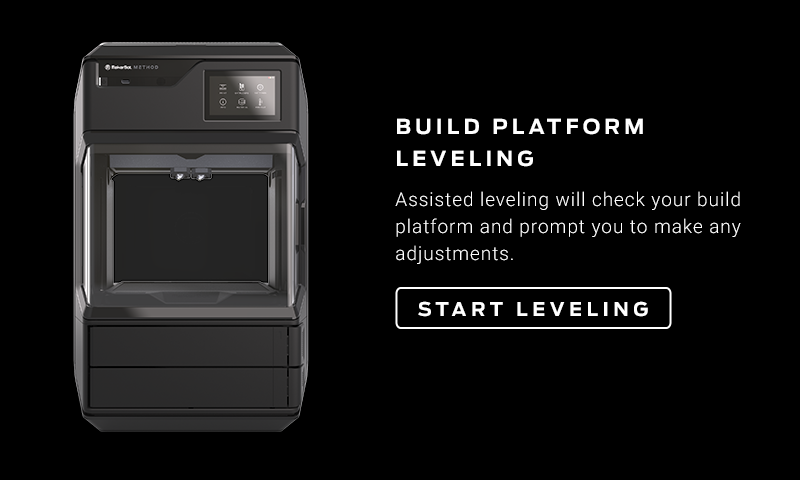
To begin the assisted leveling process, click "Start Leveling".
The first stage in the assisted leveling process is for the MakerBot Method to determine the levelness of the build platform.
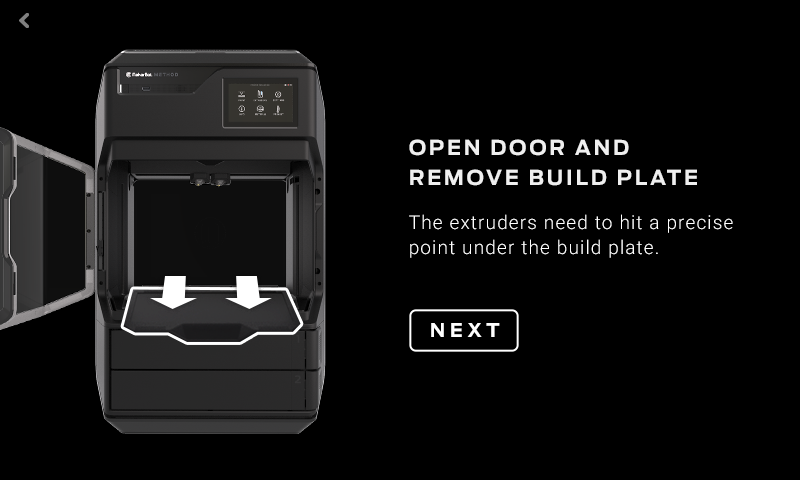
If the removable spring steel build plate is in place, open the door, remove it, set it aside, close the door and click "Next" to proceed. If the build plate is not in place, just click "Next" to proceed.
Your MakerBot Method will now check to ensure that the build platform is level. To do this, the printer will move the extruders around the build area and have the built in sensor check the build platform height at 3 locations. This may take a few minutes.
Build Platform is Level
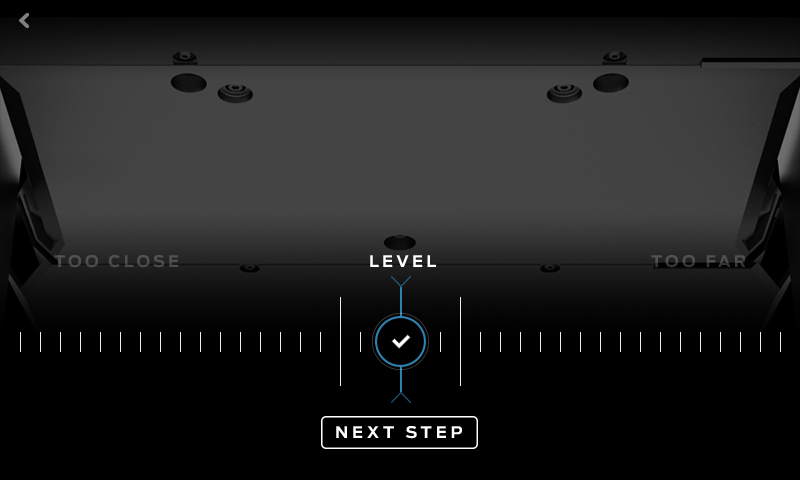
If your build platform is level, the screen below will appear:
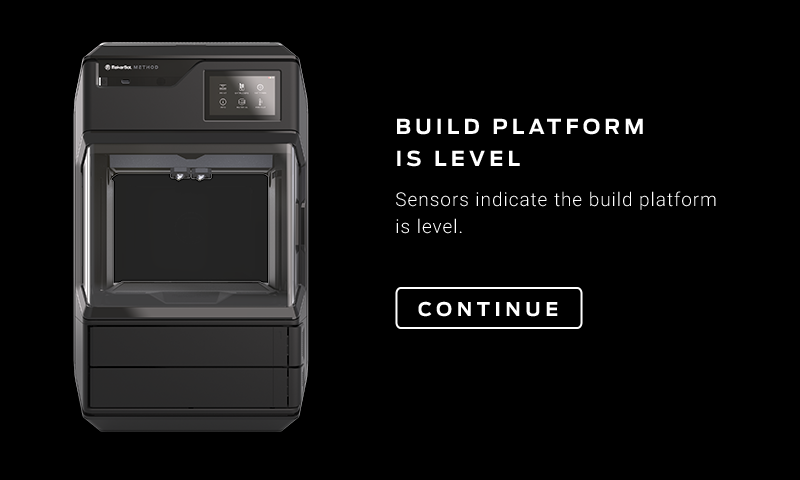
This indicates that your build platform is level and the full assisted leveling procedure is not necessary. Click "Continue" to return to the home screen. If you are seeing print quality issues, run the calibration routine again.
Build Platform is not level
If your build platform is not level, you will be automatically entered into the assisted leveling script.
The first step is to located the two screws that will be used to level the build platform.
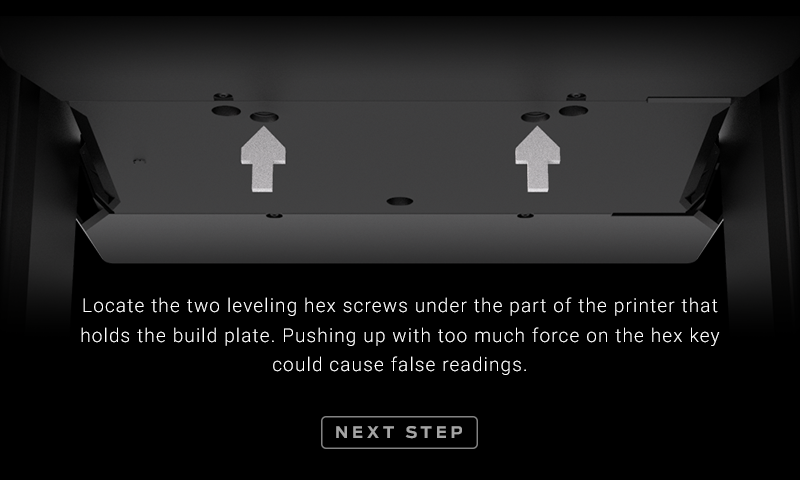
There are 4 holes with screws in the front of the build platform. It is important that you only adjust the two indicated on the LCD screen. The screws are located in the back most and center most holes.
Once you have located these screws, click "Next Step" to proceed. The MakerBot Method will then measure the levelness again to determine the best way to proceed.
Depending on the measurements, the procedure will then have you adjust the left and then the right screw and will have you loosen or tighten it. Follow the onscreen instructions to proceed. The process will start with the left screw.
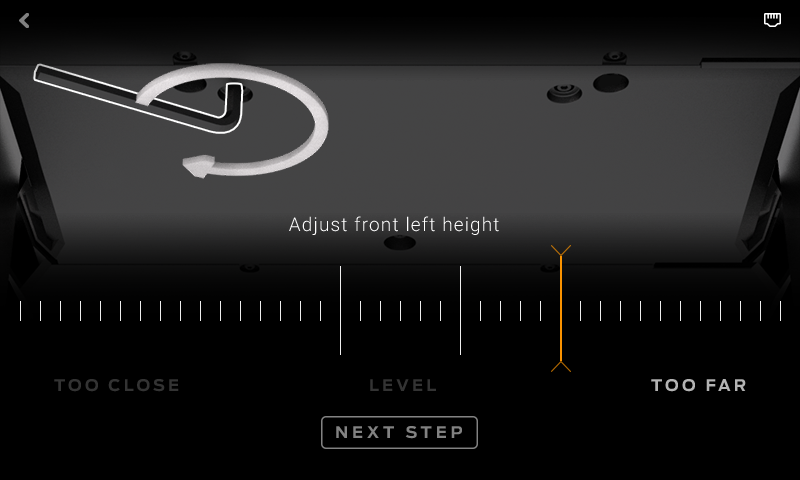
Use the leveling hex key slowly turn the indicated screw in the direction shown by the white arrow on your interface. This will cause the orange line on the dial to move towards the two longer while lines in the center of the dial.
It is possible that the build plate is out of level enough that the orange line does not appear on the screen. If this is the case, turn the screw in the indicated direction until the orange line appears onscreen and then continue to turn it until it enters the longer white lines.
Once you have centered the orange line between the elongated white lines, the interface will update to indicate that section of the build plate should now be level. If you overshoot the lines, the image will update to have you adjust the leveling screw in the other direction.
Click "Next Step" to proceed. The MakerBot Method will then measure the height of the build platform above the right leveling screw and have you adjust it using the same procedure.
Once you have adjusted both screws a first time as needed. The printer will measure the levelness again and may have you go through the procedure with either or both screws as needed. Remember throughout the whole process, you should only be adjusting the screws in the holes that are in the back center of the 4 holes up front.
Inserting the Build Plate
Once the MakerBot Method has determined that the build platform is level, you will want to reinsert your build plate.
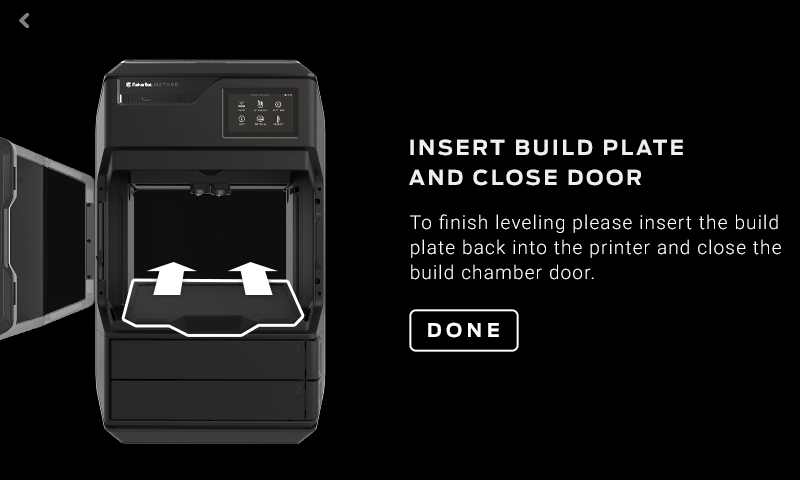
Open the door of your MakerBot Method and insert the build plate fully into the build platform. The easiest way to insert the build plate properly is to angle it at 45 degrees, seat the back of the build plate into the back notches on the build platform and then to lower the rest of the build plate into place.
Double check that the build plate is fully seated on the build platform (no space in the back) and click "Done" to continue. The leveling assisted leveling procedure is now complete.