
How to Calibrate the Extruders on MakerBot Method
When to run the Calibration routine on your MakerBot Method
- When installing new extruders
- When taking the extruders out
- When print quality issues arise that could be related to calibration
Assisted Calibration:If there is any problem with print quality or success, running the assisted calibration and leveling programs should remedy most issues.The MakerBot METHOD has an assisted calibration procedure that walks you through the process step by step. One of the first steps is to closely examine the tip of the nozzles to ensure that they are free of any material. The presence of material will cause an incorrect calibration.More specifically, any amount of material debris on the tip of the extruder nozzle can affect Z calibration, while material debris on the side of a nozzle can affect XY calibration.If you see material on the nozzles, please select “Clean Extruders” during the calibration process. You can skip this step if your nozzles are 100% clean.When using the metal brush, it is important to clean the nozzles thoroughly. Start with the bottom and then clean at a 45-degree angle from both sides. If you see material oozing out of a nozzle, you can also hold the metal brush at a 90-degree angle.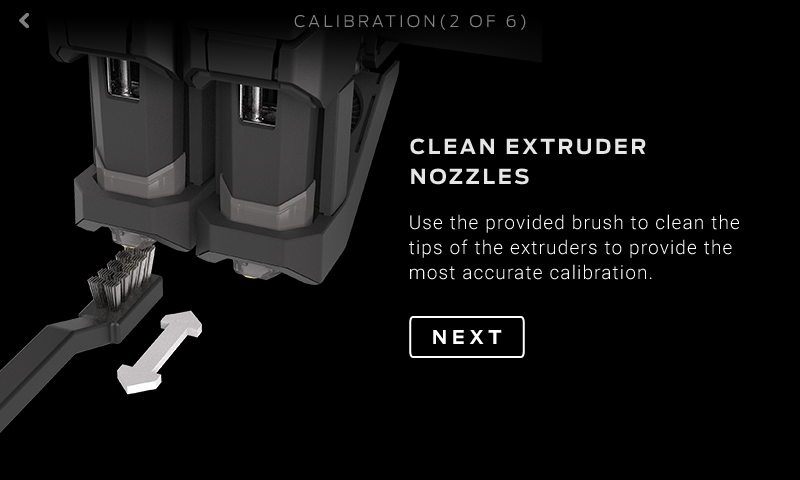 Also, be sure to check your calibration target. The calibration target is a small metal square that is located under the build plate on the Z stage. Make sure it is clean and debris free too. Once the nozzles are cleaned, you can continue and METHOD will finish the rest of the calibration procedure. To end the assisted set up, METHOD will ask you to start a test print which needs to be evaluated.
Test Print Evaluation
The Test Print can be found HERE The Test Print will ensure everything is working properly and should take about 20 minutes to complete. Once done, evaluate the print to make sure your calibration was successful:1. First, check if there are x and y gaps between the model and the support material. The outer square should separate easily from the center.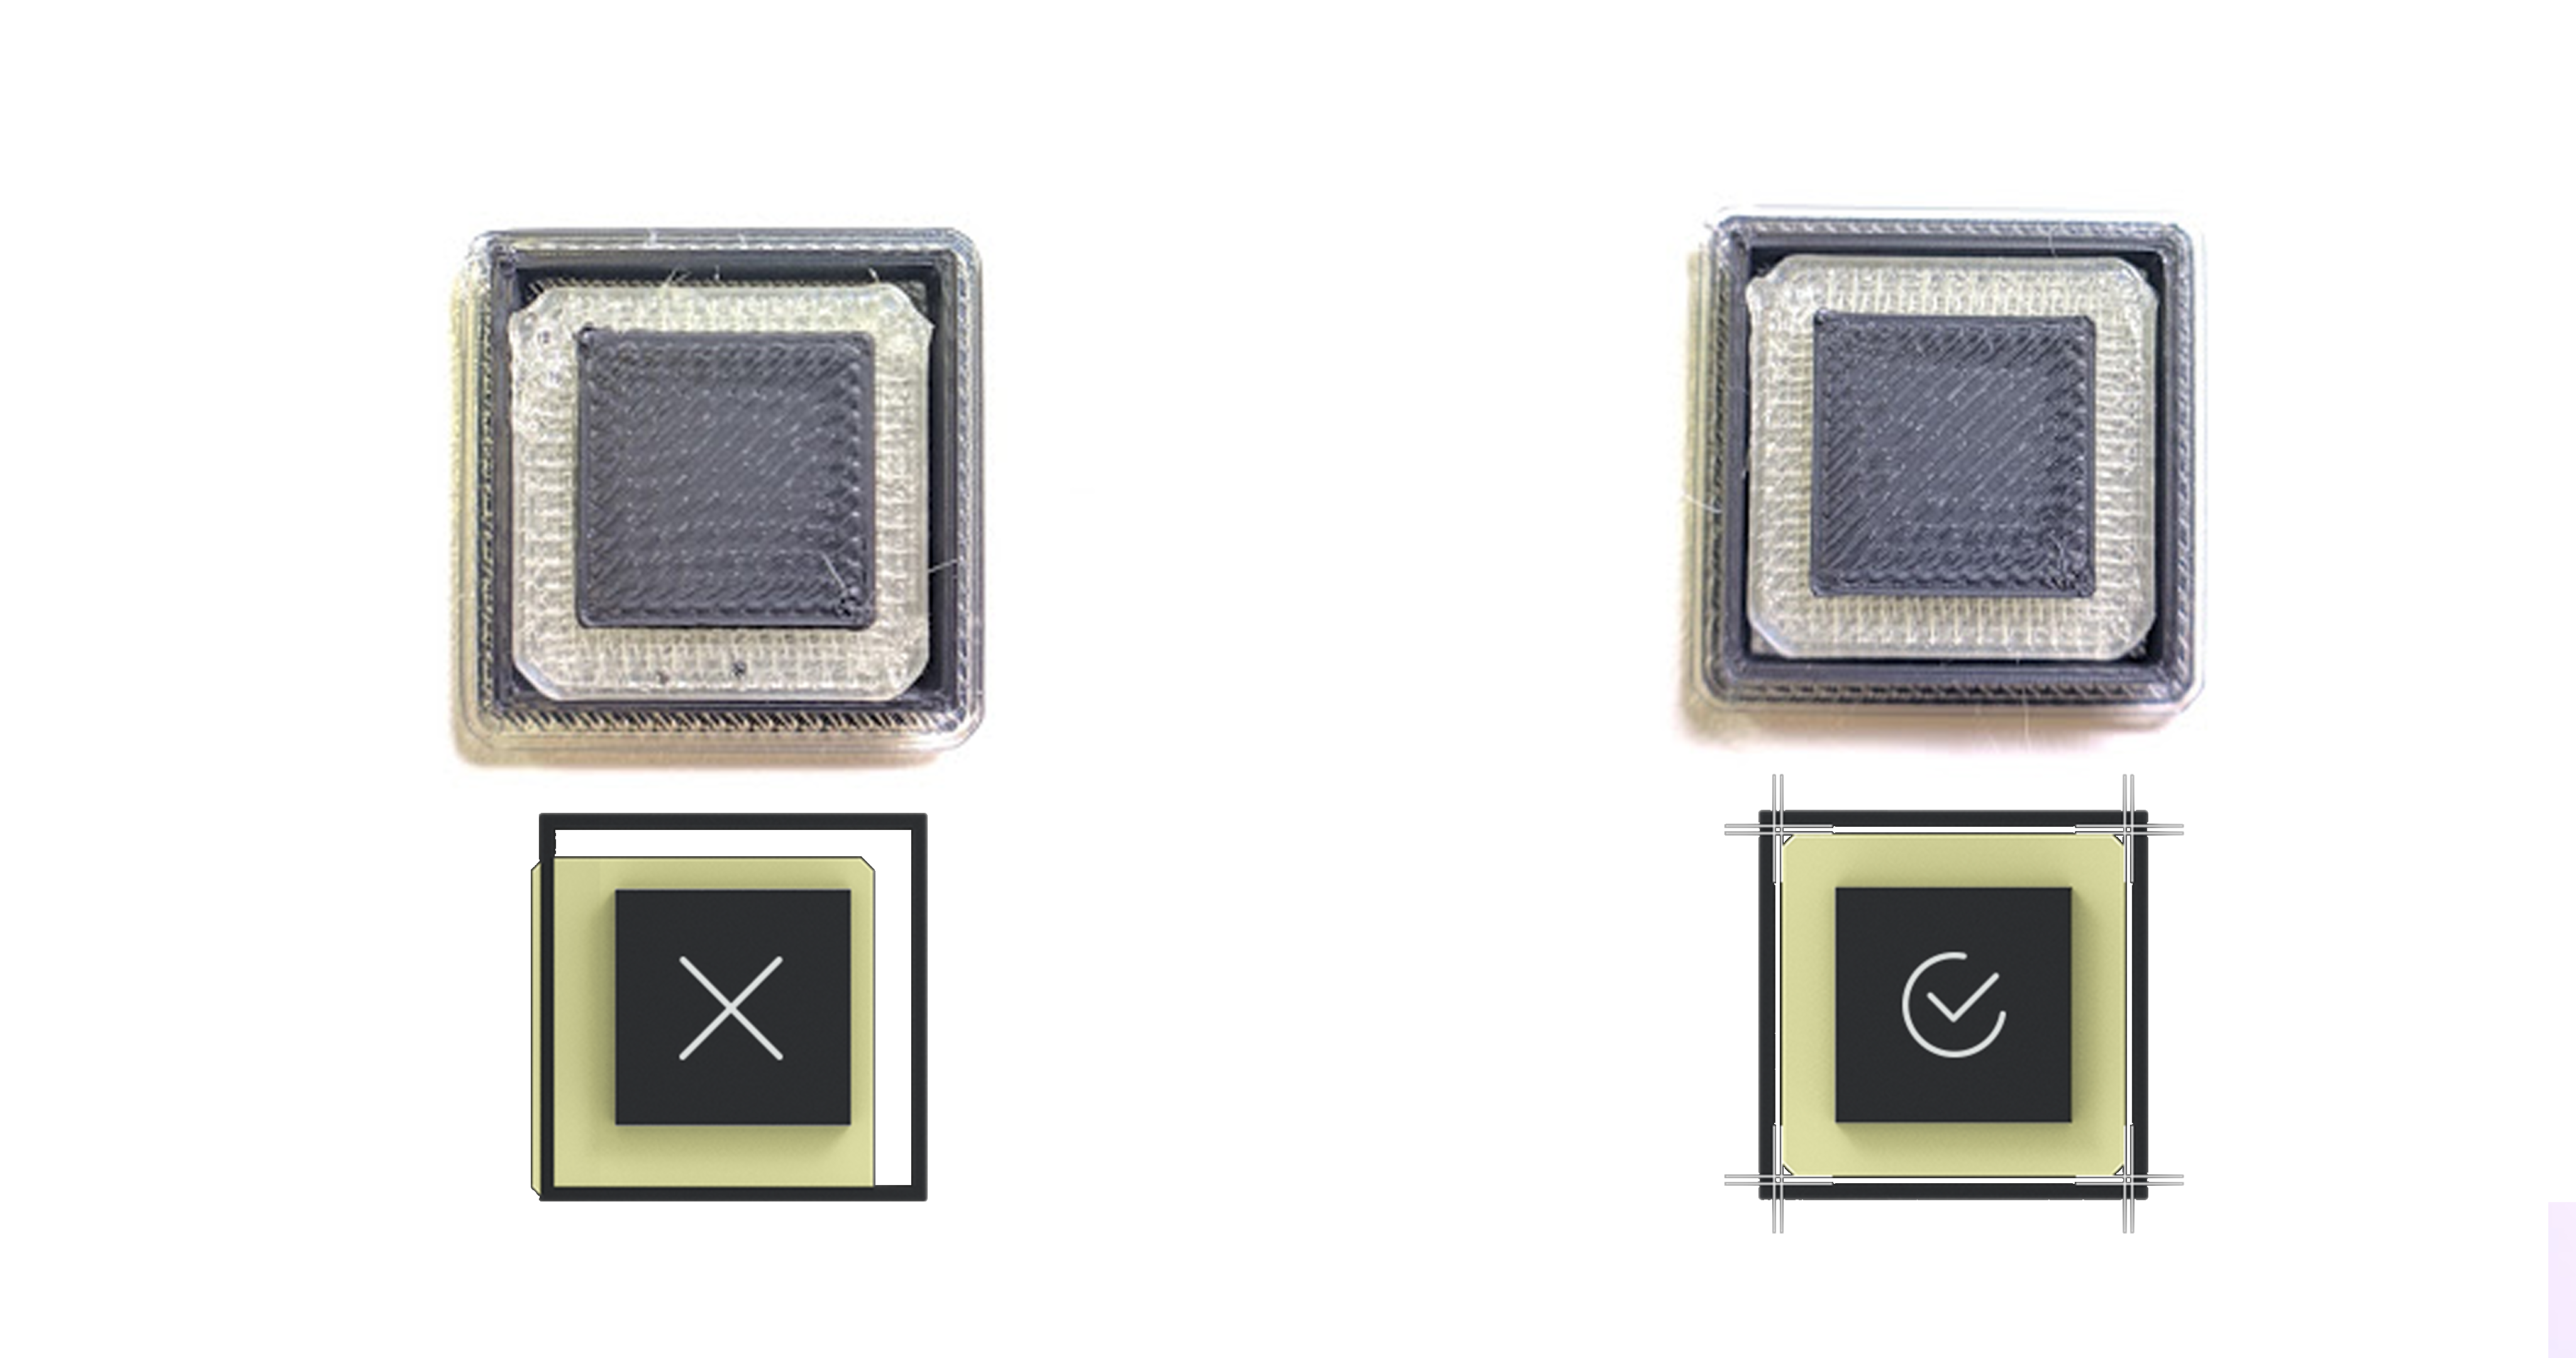 2. Remove the square piece on top and examine the sides. They should be straight. If instead they look flared, then your nozzles are too close. If they’re rounded, then your nozzles are too far away.
 3. You can also take a look at the underside of the top piece. You should be able to clearly see the extrusion path. If it looks smushed or squiggly, the distance between your nozzles is off.If you determine that your calibration is off, please run the calibration process again and be sure that the extruders are 100% clean.
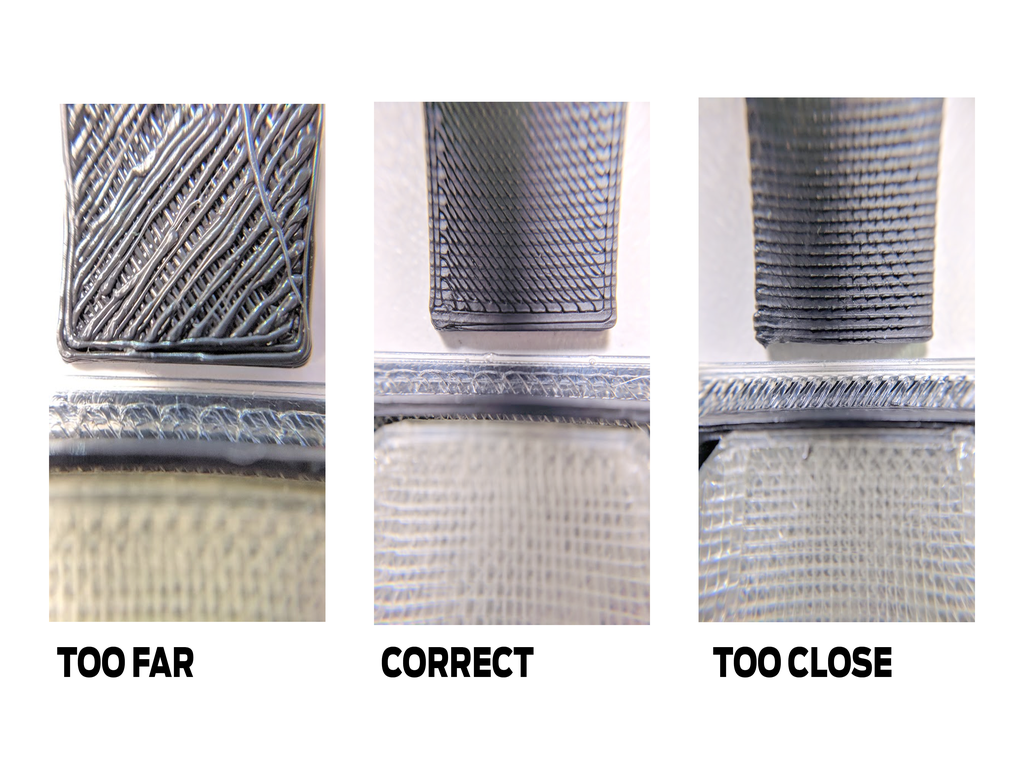
Calibration Offset Reading
If you finid that issues don't resolve after re-calibrating, or the calibration test print continues to yield results that suggest an inaccurate calibration, you may want to examine the Calibration Offset readings to determine whether or not the calibrations are similar.
While it's best to contact MakerBot Support via email, phone, or LiveChat, if you have multiple bad calibrations after performing the calibration process accurately, It can be helpful to come prepared with Calibration offset comparisons so that we can more quickly find a solution for you
Check out the video guide below to learn how to read and record the Calibration Offsets