How can I change the nozzle of the MakerBot Method Extruder
How can I change the nozzle of the MakerBot Method Extruder or LABS Experimental Extruder?
The MakerBot Method Extruder & LABS Experimental Extruder is designed so the nozzle is easily swappable. This allows you to try other nozzle types in the future and it also allows for easy swapping of damaged nozzles. There are a few simple steps to replacing the nozzle
The extruder is designed so the PTFE tube and nozzle are easily swappable if problems arise from wear or trying new materials. There are a few simple steps to replacing them.
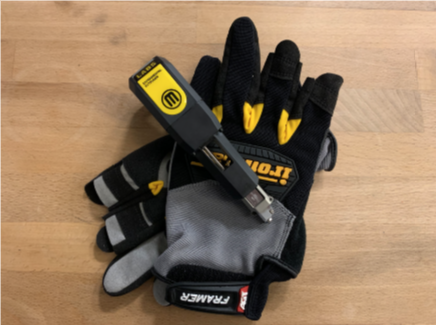
It is much easier to remove the nozzle when the extruder is still hot, this prevents any excess plastic from acting as a glue between the extruder core and the nozzle. Take care when handling the hot extruder, the plastic is safe to touch but the aluminum core and nozzle can burn. Using a pair of cloth work gloves is recommended.
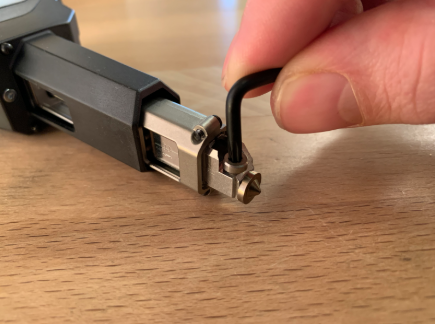
Loosen the set screw.
Loosen the set screw that holds the nozzle in place. It only needs to be turned about 5 full rotations to release it. The screw should not be completely backed out of the hole.
Loosen and remove the nozzle.
Slide the nozzle removal tool into the grooves below the nozzle. After it is slid in, use the tool to pry the nozzle free. The nozzle can then be pulled out of the extruder.
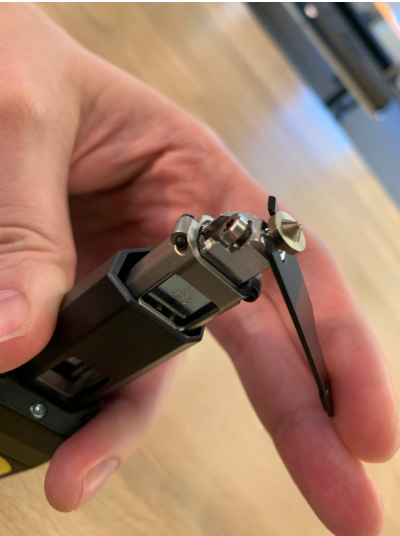
Remove the Nozzle PTFE tube.
After the nozzle has been removed, allow the extruder to cool to the touch. You can use the thin end of the removal tool to get access to the PTFE tube, pull this out the back of the extruder.
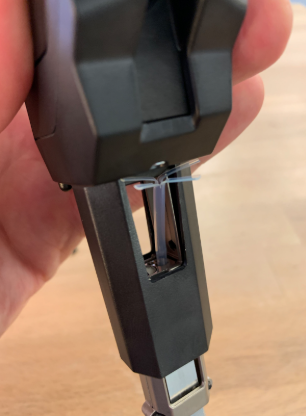
Bend back the new PTFE tube and slide it into the extruder.
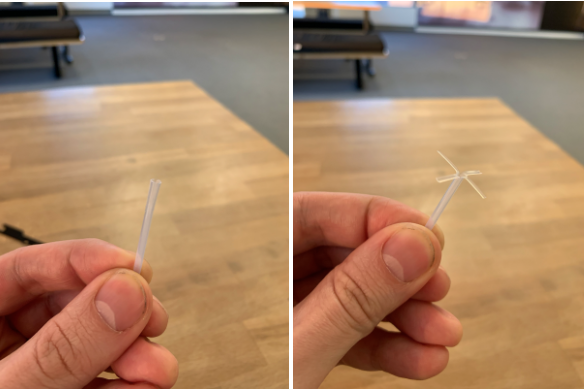
Bend back the new PTFE tube and slide it into the extruder.
When the PTFE tube is inside the extruder the new nozzle can be slid into the extruder. Be sure the PTFE tube flowers outward as this helps create the seal of the extruder. Use the small end of the nozzle removal tool to help bend back the parts of the tube. Once all are bent outward, push the extruder nozzle back into the extruder.
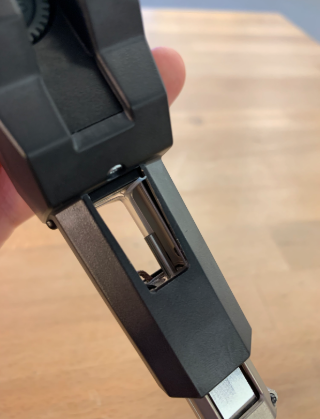
Be sure the nozzle is pressed all the way into the extruder.
A flat surface can be used to press down on to make sure the nozzle is seated. Do not use steel, stone, formica, or any other hard surface to press the nozzle in or you may damage it. Wood or plastic is perfect.
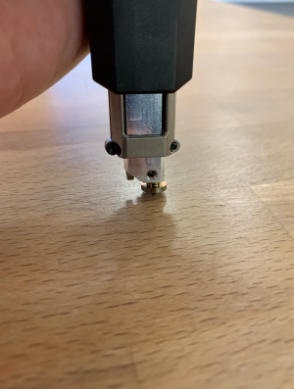
Hand tighten the screw to ensure the nozzle is locked in place.
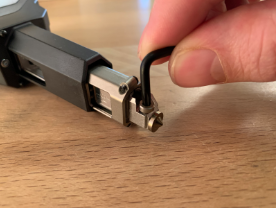
The set screw is a M3, it does not take a lot of torque to tighten it sufficiently. Excessive torque can easily strip the aluminum threads.
Congrats!
The nozzle is now replaced but does require you to initiate a calibration routine via the Method Touch screen.
